
Intro
Well, there is quite a bit to setting up a Kubernetes (K8) cluster. Remember this, this is a full K8 cluster setup with all needed steps to get K8 running on Debian 11.
Found this article: https://www.linuxtechi.com/install-kubernetes-cluster-on-debian/
This includes the following:

Components
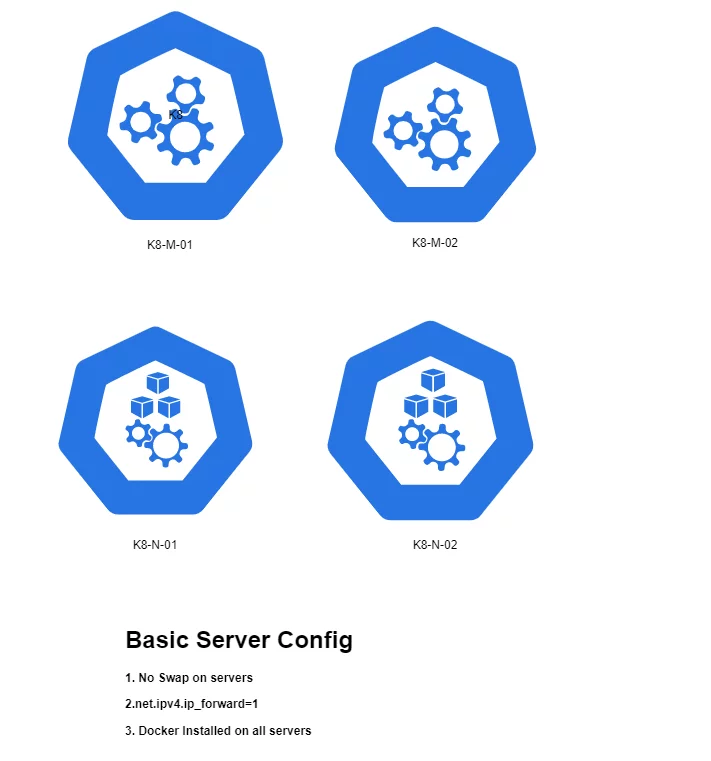
2 master nodes and 2 worker nodes. All will have Docker installed and all will be running in ProxMox
Also, I will be setting up a HAProxy server using Debian 11 as a load balancer between the master nodes. Note, this will become the address used to access the master nodes. This VIP will balance and failover between any master nodes configured to work in this cluster. At least two masters are recommended in an HA setup. Also, it would be possible to add this configuration to pfSense and avoid the added HAProxy server. However, for this demo I am leaving pfSense out of the picture. In the end, I will include a new series of posts that will outline my entire HA Proxmox setup that is running the k8 cluster.
Pre Step 1: Define IP’s and DNS Names
So, best to plan out all names domain info and IP’s needed for this configuration.
| FQDN | IP | Type | Description | Steps |
|---|---|---|---|---|
| k8master.cld.alshowto.com | 192.168.50.200 | Load Balancer | Main Load Balancer for Master Node access | Step 2 only |
| k8-m-01.cld.alshowto.com | 192.168.50.202 | Master Node 1 | First master node in cluster | Step 3 – 6 |
| k8-m-02.cld.alshowto.com | 192.168.50.203 | Master Node 2 | Second master node in cluster | Step 3 – 5 Skip step 6 then Step 8 |
| k8-m-03.cld.alshowto.com | 192.168.50.204 | Master Node 3 | Third master node in cluster | Step 3 – 5 Skip step 6 then Step 8 |
| k8-n-01.cld.alshowto.com | 192.168.50.205 | Worker Node | First worker node in cluster | Step 3 – 5 Skip step 6 then Step 7 |
| k8-n-02.cld.alshowto.com | 192.168.50.206 | Worker Node | Second worker node in cluster | Step 3 – 5 Skip step 6 then Step 7 |
| k8-n-03.cld.alshowto.com | 192.168.50.207 | Worker Node | Third worker node in cluster | Step 3 – 5 Skip step 6 then Step 7 |
Also, it is important to add all of the names into DNS and make sure each is pingable from each other. At least, set the names and ip in the /etc/hosts file on each server that will interact with cluster.
Step 1: Install VMs on ProxMox

1-1: Install pfSense
First and Most important, install pfSense to serve the DMZ/CLD router. So, I have many sub-domains and and have associated vlans to each of the sub domains
| 192.168.0.0/23 | NA | non-vlan LAN subnet. Original subnet that I use for general catch all. | pfSense LAN |
| 192.168.2.0/24 | 2 | DMZ vlan this is where my general web server are running | pfSense DMZ |
| 192.168.5.0/24 | 5 | This is my Ceph cluster_network only used for my main ceph partition. | |
| 192.168.6.0/24 | 6 | This is my Ceph public_network only used for my main ceph partition. This allows access to ceph admin gui. | |
| 192.168.50.0/24 | 50 | CLD network for kubernetes cluster. | pfSense CLD |
| NA | 999 | WAN VLAN 10g Port 2 untags and tags this VLAN | All WAN access via ISP DHCP |

As shown above, this is my current VLAN and subnet running on two switches. A 10g switch and a 1g switch. I am not going to go into all the setup of VLAN as this post would never end if I did so. Only point, it is important to segment out what works for you in your environment. Having DMZ and CLD separate from LAN protects each from the others. Overall, this adds layers of isolation. So, look for a post related to this setup in the future. See, here is the start of that post.
Step 2: Make HAProxy VM
Simple, just create a Debian 11 container or VM and install HAProxy on it. Then run the following apt on it.
sudo apt-get update
sudo apt-get upgrade
sudo apt-get install haproxy qemu-guest-agent
Then configure the HAProxy config at /etc/haproxy/haproxy.cfg
sudo nano /etc/haproxy/haproxy.cfgBelow, is an example of the config file. Note: this does not modify global or defaults this the two … elements. Therefore, the top four lines are only for reference within the default config file. Overall, adjustments may have to be made.
<kube-balancer-ip> = Load balancer ip or it can also simply be a *
<kube-master0-ip> = Master 0 ip for master node 0.
<kube-master1-ip> = Master 1 ip for master node 1.
global
       ....
defaults
       ....
frontend kubernetes
    bind <kube-balancer-ip>:6443
    option tcplog
    mode tcp
    default_backend kubernetes-master-nodes
frontend http_front
    mode http
    bind <kube-balancer-ip>:80
    default_backend http_back
frontend https_front
    mode http
    bind <kube-balancer-ip>:443
    default_backend https_back
backend kubernetes-master-nodes
    mode tcp
    balance roundrobin
    option tcp-check
    server k8s-master-0 <kube-master0-ip>:6443 check fall 3 rise 2
    server k8s-master-1 <kube-master1-ip>:6443 check fall 3 rise 2
backend http_back
    mode http
    server k8s-master-0 <kube-master0-ip>:32059 check fall 3 rise 2
    server k8s-master-0 <kube-master1-ip>:32059 check fall 3 rise 2
backend https_back
    mode http
    server k8s-master-0 <kube-master0-ip>:32423 check fall 3 rise 2
    server k8s-master-0 <kube-master1-ip>:32423 check fall 3 rise 2
Step 2: Remove swap
Note, If using Debain 11 cloud images no swap so this can be skipped.
nano /etc/fstab


# swap was on /dev/sda6 during installation # UUID=18b43798-486f-499d-9edf-2c551b34b5a1 none swap sw 0 0
Comment the following line:
# swap was on /dev/sda6 during installation # UUID=18b43798-486f-499d-9edf-2c551b34b5a1 none swap sw 0 0Step 3: Install Container Layer
No matter the below layers this should be applied to allow Kubernetes to run correctly with respect to iptables.
# Setup Kernel Parameters
cat <<EOF | sudo tee /etc/modules-load.d/containerd.conf
overlay
br_netfilter
EOF

sudo modprobe overlay
sudo modprobe br_netfilter

cat <<EOF | sudo tee /etc/sysctl.d/99-kubernetes-k8s.conf
net.bridge.bridge-nf-call-iptables = 1
net.ipv4.ip_forward = 1
net.bridge.bridge-nf-call-ip6tables = 1
EOF

sudo sysctl --system
Done, so next is to pick Containerd or full Docker install. Remember, Containerd is in both but Containerd only is a smaller footprint and thus less attack vectors exist. So, the decision is yours and what requirements that are needed for your use case. Personally, I would install less and then if needed you can add full Docker if it is found it is needed. So, there are two options outlined below.
- Option 1 (Containerd Only) – light version less attack vectors and still runs K8 great!
- Option 2 (Full Docker) – Full version of Docker is installed this way thus full docker support available on server that runs this option.
Overall, both options work so whatever option you choose is fine. Just remember on light servers like raspberry pie containerd option is lighter.
Step 4-a: Containerd Version (Option 1) Both Master and Workers Use.
Simple Containerd install, this is a lighter that Docker containerd only layer to run Kubernetes without the full Docker layer in place. Thus a smaller attack vector exists as it does not contain the full Docker stack on server running Kubernetes. So, remember install Option 1 this containerd layer or Option 2 Docker Layer below.
First, make sure all needed packages are installed such as curl and pnupg to handle keys.
sudo apt install -y gnupg gnupg2 curl qemu-guest-agentNow, Add containerd package to apt.
curl -fsSL https://download.docker.com/linux/debian/gpg | sudo apt-key add -
echo "deb [arch=amd64] https://download.docker.com/linux/debian buster stable" |sudo tee /etc/apt/sources.list.d/docker.list
sudo apt update
Finally, install containerd.io package from docker as it is a better version that works with K8 > 1.25 see here for more details.
sudo apt install containerd.ioSetup containerd to work correct with K8
Now, it is time to setup containerd config to work correctly with Kubernetes and use SystemdCgroup as required for Kubernetes.
containerd config default | sudo tee /etc/containerd/config.toml >/dev/null 2>&1

sudo sed -i '/SystemdCgroup = true/d' /etc/containerd/config.toml

sudo sed -i "s/SystemdCgroup = false/SystemdCgroup = true/" /etc/containerd/config.toml

sudo systemctl restart containerd

sudo systemctl enable containerd

sudo systemctl status containerd
Now, skip option 2 below and install kubernetes packages.
Step 4-b: Docker Version (Option 2)
Use the Docker Layer instead of Containerd Option 1 above. See here and follow 1-a and 1-b.
curl -fsSL https://get.docker.com -o get-docker.sh
sudo sh get-docker.sh
sudo usermod -aG docker $USER
newgrp docker
docker run hello-worldSo, setting up Docker to use SystemdCgroup here is one way to configure that option in /etc/docker/daemon.json.
sudo nano /etc/docker/daemon.jsonFix SystemdCgroup in Docker
Now, if this is a new file as it should be type in the below code.
{
    "exec-opts": ["native.cgroupdriver=systemd"]
}
Restart docker
sudo systemctl restart dockerNow really fix SystemCgroup!!! in Containerd layer for Option 2
However, it has never worked for me so then I do the steps in this section to really fix SystemCgroup.
Create default Containerd config with SystemdCgroup = true
containerd config default | sudo tee /etc/containerd/config.toml >/dev/null 2>&1

sudo sed -i '/SystemdCgroup = true/d' /etc/containerd/config.toml

sudo sed -i "s/SystemdCgroup = false/SystemdCgroup = true/" /etc/containerd/config.toml

sudo systemctl restart containerd

sudo systemctl enable containerd
Step 5: Install K8 on VM
Now, setup kubernetes source packages and key.
KEYRING=/usr/share/keyrings/kubernetes.gpg

#Get Key add to keyring
curl -s https://packages.cloud.google.com/apt/doc/apt-key.gpg | gpg --dearmor | sudo tee "$KEYRING" >/dev/null

#add associated packages to apt
echo 'deb [signed-by=/usr/share/keyrings/kubernetes.gpg] http://apt.kubernetes.io/ kubernetes-xenial main' | sudo tee /etc/apt/sources.list.d/kurb.list >/dev/null
Now, update apt repository with new kubernetes packages.
sudo apt updateFinally, Install the 1.24.12-00 version of kubernetes that is compatible with Rancher.
sudo apt install -y kubelet=1.24.12-00 kubeadm=1.24.12-00 kubectl=1.24.12-00 Oh, also mark the K8 on hold so they do not auto update and break things in the future.
sudo apt-mark hold kubelet kubeadm kubectlStep 6: Make First Master Node
ClusterConfiguration
So, now it is time to create the first node. First, create a cluster create yaml file like below called kubeadmcf.yaml.
cd ~

nano kubeadmcf.yaml
Note:
<LB_FQDN> = fully qualified domain name for Load Balancer. DNS or hosts; actually both should be setup to include this info.
<LB_IP> = Load Balancer IP.
<6443> = optional port for Load Balancer related port for control plain if left off then it will default to 6443.
<podSubnet> = pod network subnet cidr like 10.50.0.0/16
apiVersion: kubeadm.k8s.io/v1beta3
kind: ClusterConfiguration
kubernetesVersion: stable
apiServer:
  certSANs:
  - "<LB_FQDN>"
  - "<LB_IP>"
controlPlaneEndpoint: "<LB_FQDN>:<6443>"
networking:
  podSubnet: "<podSubnet>" # --pod-network-cidr
Mine looks like this:
apiVersion: kubeadm.k8s.io/v1beta3
kind: ClusterConfiguration
kubernetesVersion: stable
apiServer:
  certSANs:
  - "k8master.cld.alshowto.com"
  - "192.168.50.200"
controlPlaneEndpoint: "k8master.cld.alshowto.com:6443"
networking:
  podSubnet: "10.50.0.0/16" # --pod-network-cidr
So with this config file run the following command
sudo kubeadm init --config=kubeadmcf.yamlThen once cluster is created and if using a non root user then do this.
mkdir -p $HOME/.kube
sudo cp -i /etc/kubernetes/admin.conf $HOME/.kube/config
sudo chown $(id -u):$(id -g) $HOME/.kube/config
Finally, do the same for root so the last commands can be ran.
sudo mkdir -p /root/.kube
sudo cp /etc/kubernetes/admin.conf /root/.kube/config
sudo chown root:root /root/.kube/config
Configure Calico as CNI
Now, it is time to create the cluster network interface. I have used Calico because it supports BGP so I can configure my opnSense router that is routing my cloud network allow for proper routing to the pods directly.
Create a file called calico-installation.yaml and past the following
cd ~
nano calico-installation.yaml
# This section includes base Calico installation configuration.
# For more information, see: https://docs.projectcalico.org/v3.19/reference/installation/api#operator.tigera.io/v1.Installation
apiVersion: operator.tigera.io/v1
kind: Installation
metadata:
name: default
spec:
# Configures Calico networking.
calicoNetwork:
bgp: Enabled
# Note: The ipPools section cannot be modified post-install.
ipPools:
- blockSize: 26
cidr: 10.50.0.0/16
encapsulation: IPIP
natOutgoing: Enabled
nodeSelector: all()
Now it is time to run that config into kubectl
kubectl create -f https://raw.githubusercontent.com/projectcalico/calico/v3.25.1/manifests/tigera-operator.yaml
kubectl apply -f calico-installation.yaml
Now create calicoctl.cfg
nano calicoctl.cfgCopy the config text below into newly created file
apiVersion: projectcalico.org/v3
kind: CalicoAPIConfig
metadata:
spec:
  datastoreType: "kubernetes"
  kubeconfig: "/root/.kube/config"
Next install calicoctl direct from github.com
cd ~
wget https://github.com/projectcalico/calicoctl/releases/download/v3.14.0/calicoctl 1> /dev/null 2> /dev/null
sudo chmod +x calicoctl
sudo mv calicoctl /usr/local/bin/
sudo mkdir /etc/calico
sudo cp calicoctl.cfg /etc/calico/
Finally, it is time to finalize the config of Calico create a file called calico-bgpconfiguration.yaml
nano calico-bgpconfiguration.yamlthen copy below config text into newly created file.
apiVersion: projectcalico.org/v3
kind: BGPConfiguration
metadata:
  name: default
spec:
  logSeverityScreen: Info
  nodeToNodeMeshEnabled: true
  asNumber: 65000

---
apiVersion: projectcalico.org/v3
kind: BGPPeer
metadata:
  name: my-global-peer
spec:
  peerIP: 192.168.50.200
  asNumber: 65000
Save the file and execute with calicoctl
sudo calicoctl apply -f calico-bgpconfiguration.yamlCommon Errors
error execution phase preflight: [preflight] Some fatal errors occurred:
     [ERROR CRI]: container runtime is not running: output: E1007 05:47:14.357349     847 remote_runtime.go:948] "Status from runtime service failed" err="rpc error: code = Unimplemented desc = unknown service runtime.v1alpha2.RuntimeService"
time="2022-10-07T05:47:14Z" level=fatal msg="getting status of runtime: rpc error: code = Unimplemented desc = unknown service runtime.v1alpha2.RuntimeService"
, error: exit status 1
[preflight] If you know what you are doing, you can make a check non-fatal with `--ignore-preflight-errors=...`
To see the stack trace of this error execute with --v=5 or higher
The above, this error occurs when SystemdCgroup = false.
At last time to finalize kubectl
kubectl create configmap haproxy-kubernetes-ingress
sudo touch /etc/default/kubelet
echo "KUBELET_EXTRA_ARGS=--node-ip=192.168.50.200" | sudo tee /etc/default/kubelet
sudo systemctl daemon-reload
sudo systemctl restart kubelet
Step 7: Install K8 Worker Nodes
kubeadm join 192.168.1.139:6443 --token 4bp4wb.kpfgj1x7zulq5sy1 \
     --discovery-token-ca-cert-hash sha256:eeb7acbd33ae54874c0481af94a6d3b8abcd84c61a7552d5e19099ec8498ece8
-control-plane
kubeadm join 192.168.1.139:6443 --token 4bp4wb.kpfgj1x7zulq5sy1 \
--discovery-token-ca-cert-hash \sha256:eeb7acbd33ae54874c0481af94a6d3b8abcd84c61a7552d5e19099ec8498ece8Step 8: Install Other K8 Master Nodes
Ok, now is a good time to bring in other nodes. But need to generate ssh key first
ssh-keygenNow there is a key in ~/.ssh/id_rsa need to cat the public key in ~/.ssh/id_rsa.pub
cat ~/.ssh/id_rsa.pubNow place that in Cloud Init on ProxMox server under ssh keys and this should allow you to connect to ssh on other master nodes without password prompt.
Below is the script that I used to copy over the needed cert files so the node could join the cluster propelry.
#!/bin/bash

USER=debian # customizable
# Set the control_plane_ips to all other master node ips or hostnames
CONTROL_PLANE_IPS="192.168.50.203"
for host in ${CONTROL_PLANE_IPS}; do
	sudo ssh -i /home/${USER}/.ssh/id_rsa "${USER}"@$host "sudo mkdir -p /etc/kubernetes/pki/etcd"
	sudo ssh -i /home/${USER}/.ssh/id_rsa "${USER}"@$host "sudo chown ${USER}:${USER} -R /etc/kubernetes"
    sudo scp -i /home/${USER}/.ssh/id_rsa /etc/kubernetes/pki/ca.crt "${USER}"@$host:/etc/kubernetes/pki/ca.crt
    sudo scp -i /home/${USER}/.ssh/id_rsa /etc/kubernetes/pki/ca.key "${USER}"@$host:/etc/kubernetes/pki/ca.key
    sudo scp -i /home/${USER}/.ssh/id_rsa /etc/kubernetes/pki/sa.key "${USER}"@$host:/etc/kubernetes/pki/sa.key
    sudo scp -i /home/${USER}/.ssh/id_rsa /etc/kubernetes/pki/sa.pub "${USER}"@$host:/etc/kubernetes/pki/sa.pub
    sudo scp -i /home/${USER}/.ssh/id_rsa /etc/kubernetes/pki/front-proxy-ca.crt "${USER}"@$host:/etc/kubernetes/pki/front-proxy-ca.crt
    sudo scp -i /home/${USER}/.ssh/id_rsa /etc/kubernetes/pki/front-proxy-ca.key "${USER}"@$host:/etc/kubernetes/pki/front-proxy-ca.key
    sudo scp -i /home/${USER}/.ssh/id_rsa /etc/kubernetes/pki/etcd/ca.crt "${USER}"@$host:/etc/kubernetes/pki/etcd/ca.crt
    sudo scp -i /home/${USER}/.ssh/id_rsa /etc/kubernetes/pki/etcd/ca.key "${USER}"@$host:/etc/kubernetes/pki/etcd/ca.key
    sudo scp -i /home/${USER}/.ssh/id_rsa /etc/kubernetes/admin.conf "${USER}"@$host:/etc/kubernetes/admin.conf
	sudo ssh -i /home/${USER}/.ssh/id_rsa "${USER}"@$host "sudo chown root:root -R /etc/kubernetes"
done
Once the above is ran it is time to do the following steps for the master node created to be successful. Also, these must all be ran from an existing master node that is properly joined and configured to the cluster.
- Step 3: Install Container Layer
- Step 4: Install K8 on VM
- Register the Node via the kubeadm join
The final step is new but if you no longer have the below in a shell window then I found this article and have outlined the steps below.
kubeadm join lb-01.cld.alshowto.com:6443 --token m1466z.wupvujyfv2tf33jh \
        --discovery-token-ca-cert-hash sha256:af5983a49823c033562c35b10d14edf5292740616ea26f0d1ce4a8965a8afd5c \
        --control-plane
Get K8 cert hash needed to connect to K8 cluster.
So, below is how to get the sha hash needed in line sha256:<From Below Hash>
sudo openssl x509 -pubkey -in /etc/kubernetes/pki/ca.crt \
    | openssl rsa -pubin -outform der 2>/dev/null \
    | openssl dgst -sha256 -hex \
    | sed 's/^.* //'
Retrieve Bootstrap Tokens
kubeadm token listNote: these may be expired and if they are then just run this command to generate new ones and give all outputs needed to connect nodes to cluster.
kubeadm token create --print-join-commandGenerate kubeadmin Join Command
Now, compile the above info into a new join string manually.
sudo kubeadm join <ip-address>:6443\
    --token=<token-from-step-2> \
    --discovery-token-ca-cert-hash sha256:<ca-hash-from-step-1>
Other Resources
I found this example helpful and modified some of my post info based on info in here especially useful was info around HAProxy setup for master nodes. https://medium.com/@sven_50828/setting-up-a-high-availability-kubernetes-cluster-with-multiple-masters-31eec45701a2
As far as external load balancing of workload data this article is very helpful. Note, the difference here is working with actual load balancing within kubernetes and not just load balancing the access to the master controllers. This expands on the knowledge of HAProxy and introduces the concepts needed to reduce the complexity of getting ingress access to kubernetes. I will expand on this with a separate post once I have more time to process all of the needed logic to also implement into pfSense (OpnSense) with the end goal of adding some of the GBP peering into the pfSense layer since I use that as my router anyway.